

“Gordon Freeman is imprisoned at a Courthouse. He must escape before the GMan puts him out of commission. The courthouse security is tight, as the famed Freeman must not be allowed to leave the premise before he is sentenced. P.S. This is a new version of an old map. The gameplay has been modified after the author reviewed the comments of all the playtesters. Enjoy.”
- Title: Justice
- Filename: hl2-sp-justice-v3.7z
- Original Filenames: justice-v2.zip and justice-v3.zip
- Size : 2.19MB
- Author: Satchmo
- Date Released: 30 August 2005
I have added version 2 into this version, so you can play both versions if you want to. I don’t have version 1.
Download directly into Gauge [2.19MB]
You MUST have Gauge installed before using this link.
Download to your HDD [2.19MB]
You can still use it with Gauge once you have downloaded it.
If you require more help, please visit the Technical Help page.
- Copy sp_justice_v3.bsp and sp_justice_v2.bsp file into your …\Steam\SteamApps\common\Half-Life 2\maps\ folder.
- Launch Half-Life 2
- Open the console and type map sp_justice_v3 and now press ENTER.
WARNING: The screenshots contain spoilers.
 |
 |
 |
 |
 |
 |
 |
 |
 |
 |
 |
 |
 |
 |
 |
The following walkthrough has been written by the author.
- Escape from Prison
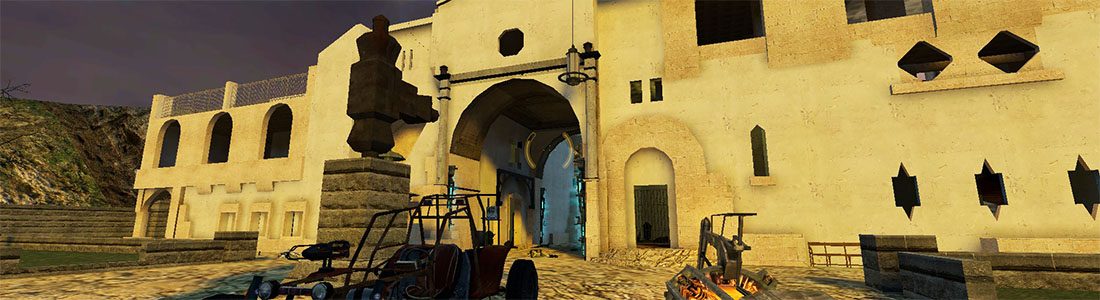
- The Courthouse
- The Record Building
- The Conference Room and Courtyard
- Postscript
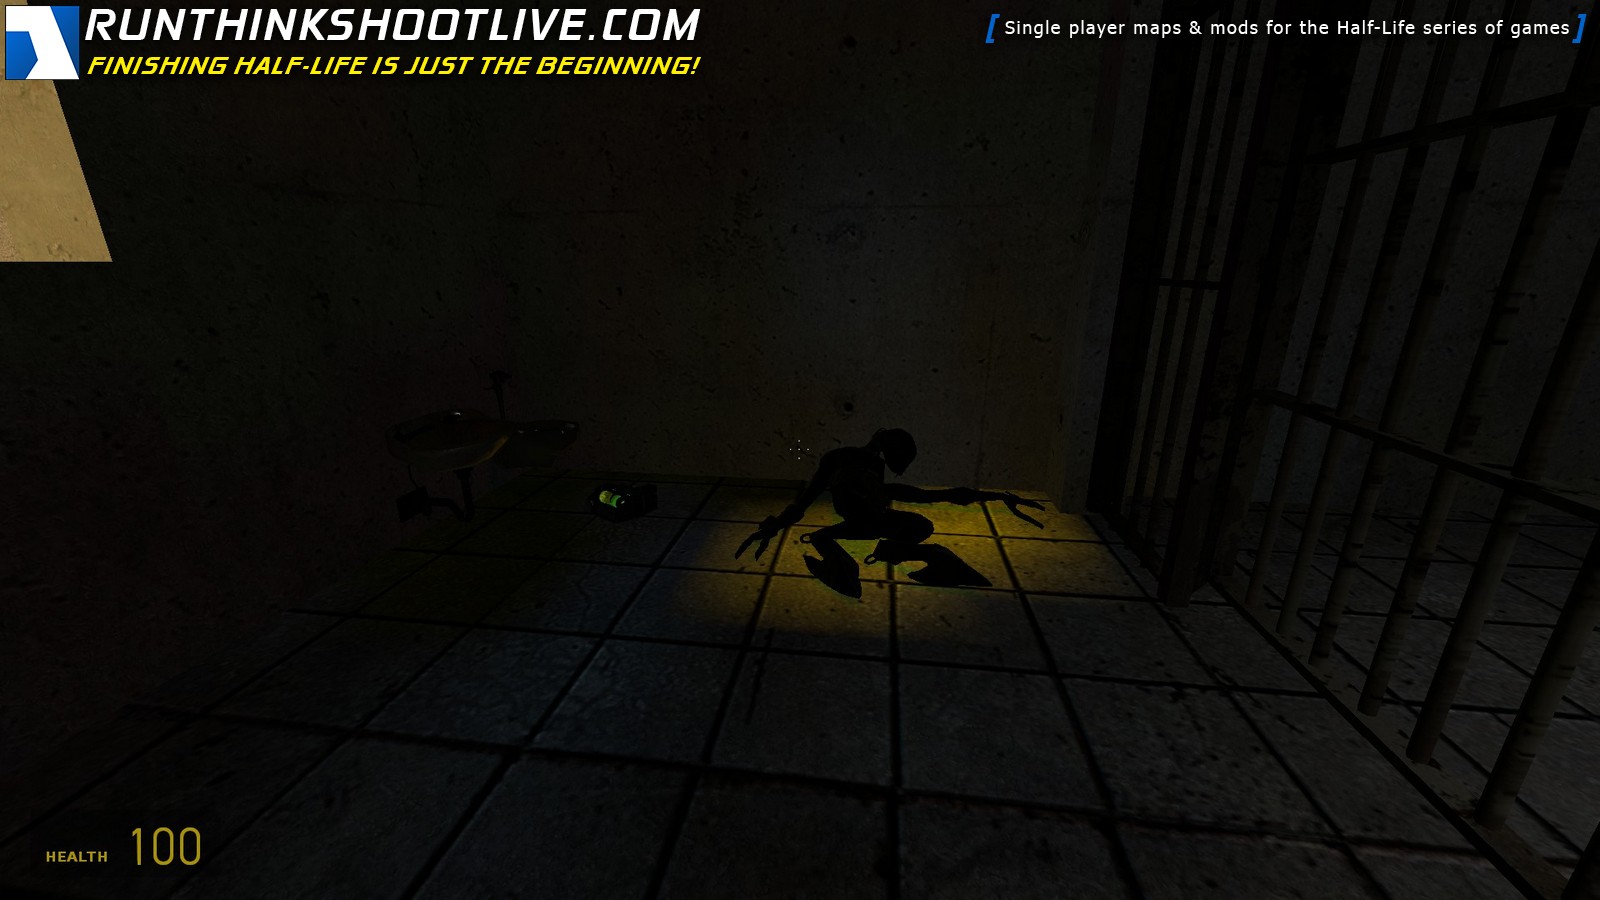
When the map loads, you find yourself as Gordon Freeman, locked up in a jail cell but thankfully still wearing your HEV suit. The sound of a Combine gunship whirls angrily outside.
Examine your surrounding, and you’ll notice a dead/unconscious cellmate slouched in another corner of the small cell. There is also a healthkit inside the jail, but you have no use for it now because you have 100% health. A metal mattress frame lies in the corner. You have no weapon to aid your escape except your bare hands.
Approach the window of the cell, and the gunship will fly past just outside. Pick up the mattress frame and position it below the window. Try to keep track of the patrol pattern of the gunship before you escape, and try to break out when the gunship is circling the opposite side of the premise. Back up and steady yourself before jumping on the frame and crouch out of the window.
Run toward the corner of the jail yard where the wall is adorned with some graffiti. Use the crates as cover from the patrolling gunship. You’ll find a crowbar there. Smash the wooden bars blocking the exit with the crowbar.
Quickly make your way to the other side of the jail yard to avoid becoming a target from the patrolling gunship. A jail guard will notice you and start firing at you with his handgun. He’ll also release a manhack at the same time. I suggest run toward him and crack open his skull with the crowbar and use the same tactic for the manhack. Inside the jail, you’ll find a healthkit under the desk. Try not to venture outside if you can help it. The gunship will quickly deminish your health if you’re spotted.
Slowly approach the prison control room. Shoot the guard in the room with your handgun, aiming for the head. Grab the gravity gun in the room, it’ll be either on a shelf or on the floor (the commotion sometimes changes the location of the gravity gun).
Grab the chair in the room with the gravity gun before you leave the room. A backup security team has been alerted for your escape. Shoot the first guard that arrives to the scene with the chair that you picked up with the gravity gun. If you fired a good shot, that’ll be enough to kill him. Otherwise, you might suffer from some rounds of his SMG.
Scavenge around inside the prison before venturing futher. Remember the healthkit inside your jail cell? It might come in handy now if you no longer have 100% health. You can grab it with the gravity gun. Another cell houses a fellow citizen. Approach him to learn about a valuable tip on escaping the premise.
One of the cells is used for storage by the guards. The metal bars prevent you from entering the cell, but use your gravity gun to obtain all the goodies inside. You should find another healthkit, a shotgun, and ammo for the shotgun inside. These will prepare you well for the Combines waiting outside.
Before you leave the prison, peek out the window next to the desk. You’ll see a Combine trying to ambush you. Load him up with some shots before he can return fire. Make sure you know where the gunship is patrolling before you step out from the cover of the prison. Dash toward the covered corridor when the gunship is not overhead.
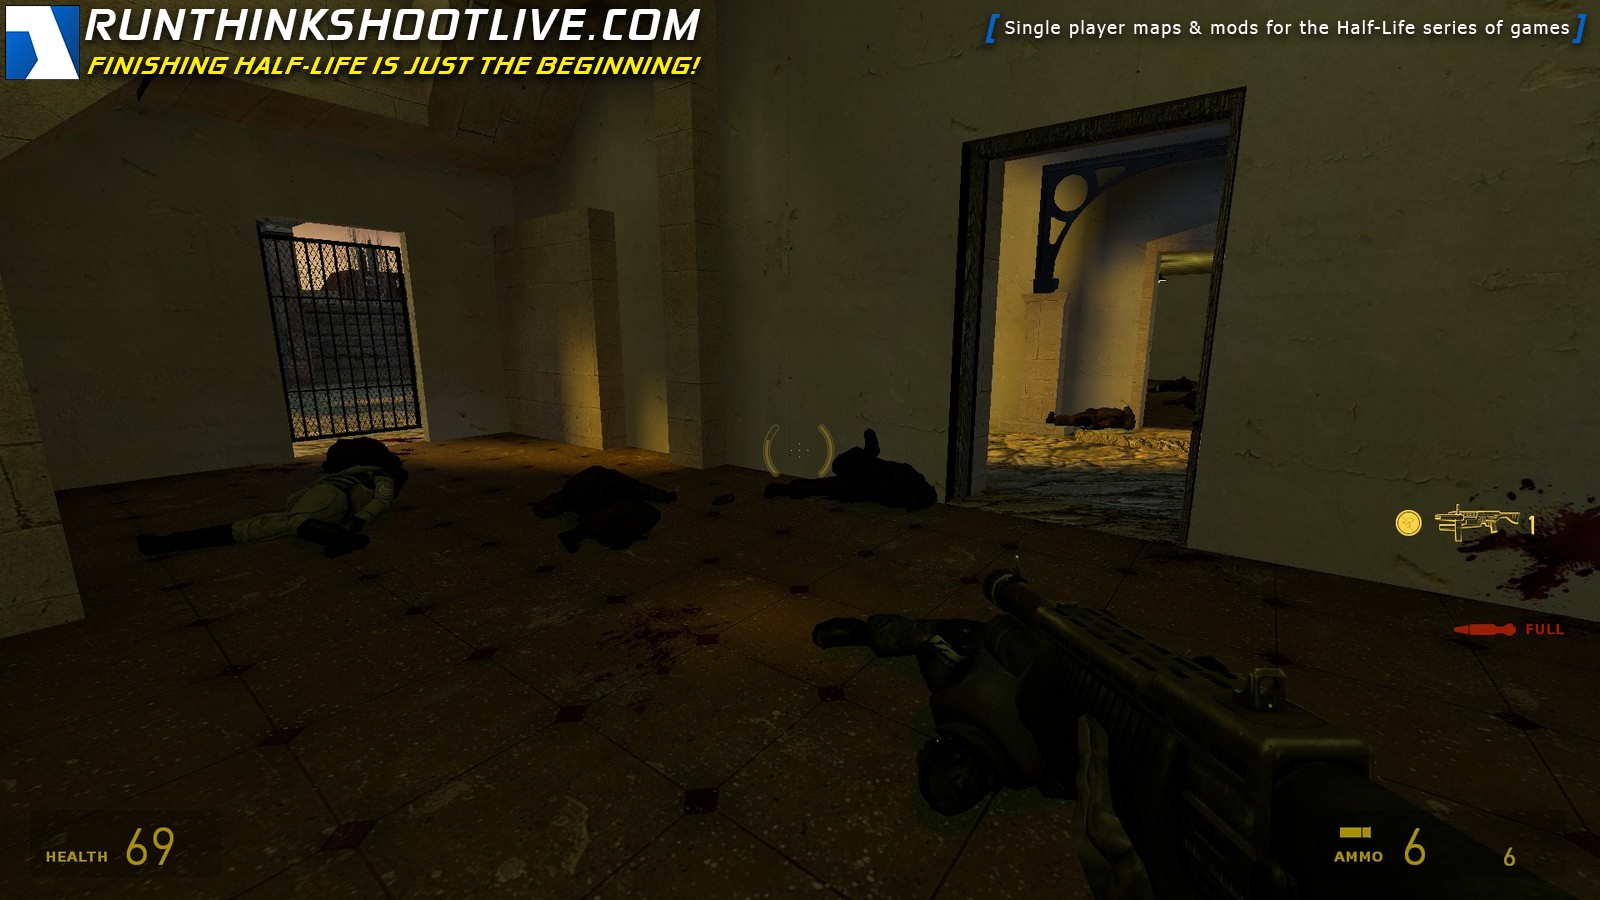
As you walk down the corridor with your loaded shotgun, a Combine will patrol into view. Shoot his head with the shotgun as fast as you can, because this Combine has a pulse rifle. You can’t afford to be slow on the draw. Another guard will immediately approach, so eliminate him with the remaining of your shotgun round. Fortunately, these soldiers drop their weapons and ammos, as well as health vial. Treat yourself with what you deservedly earned.
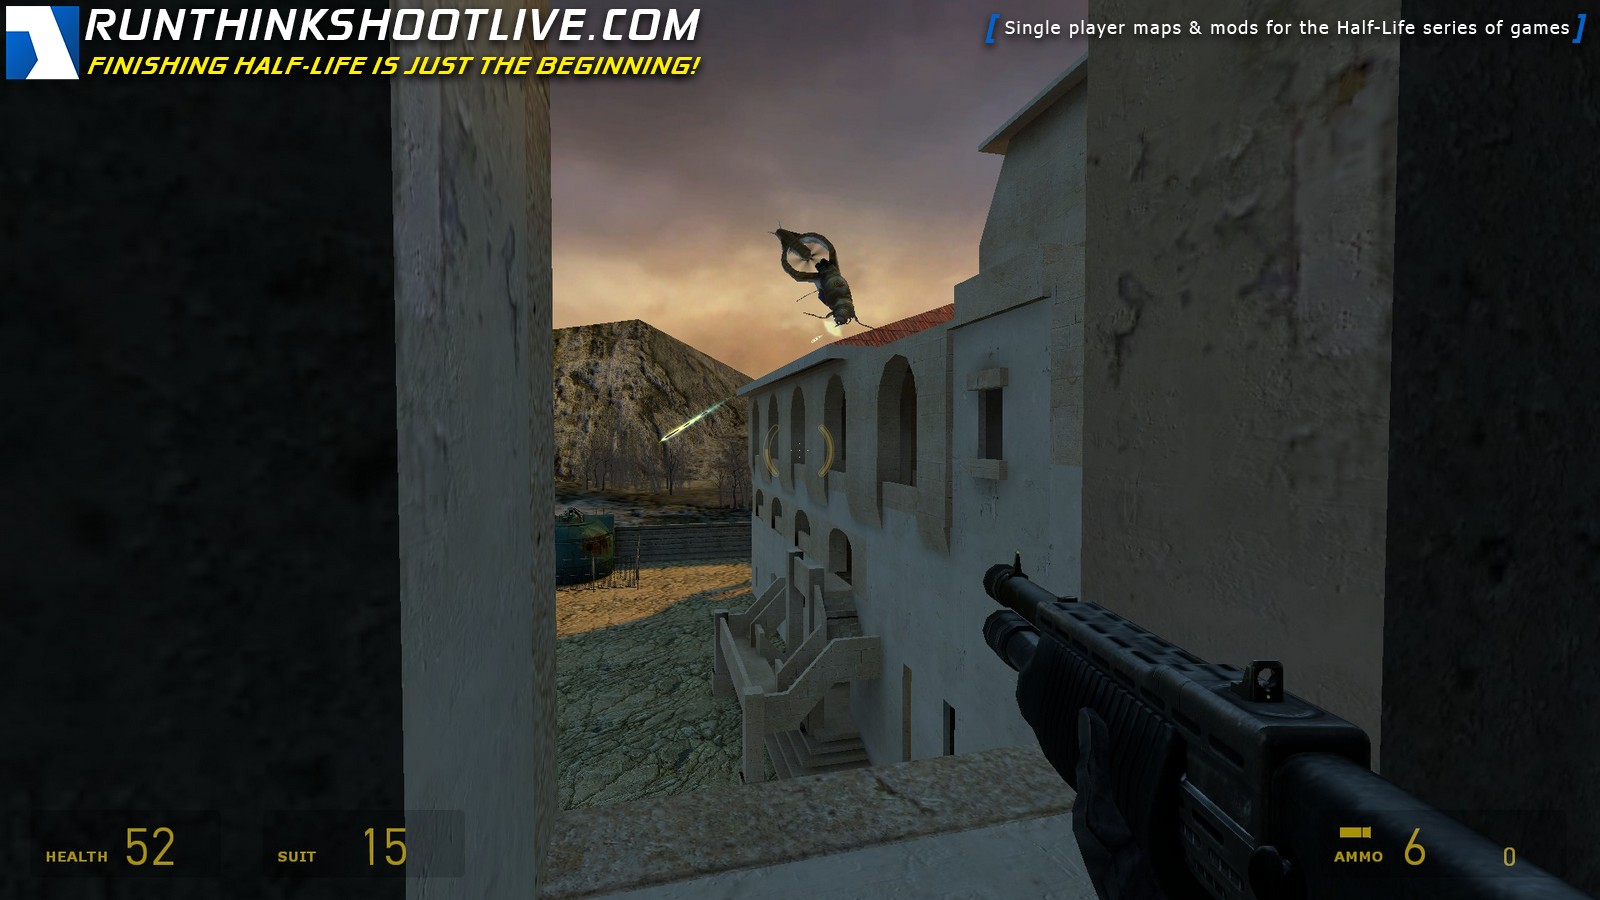
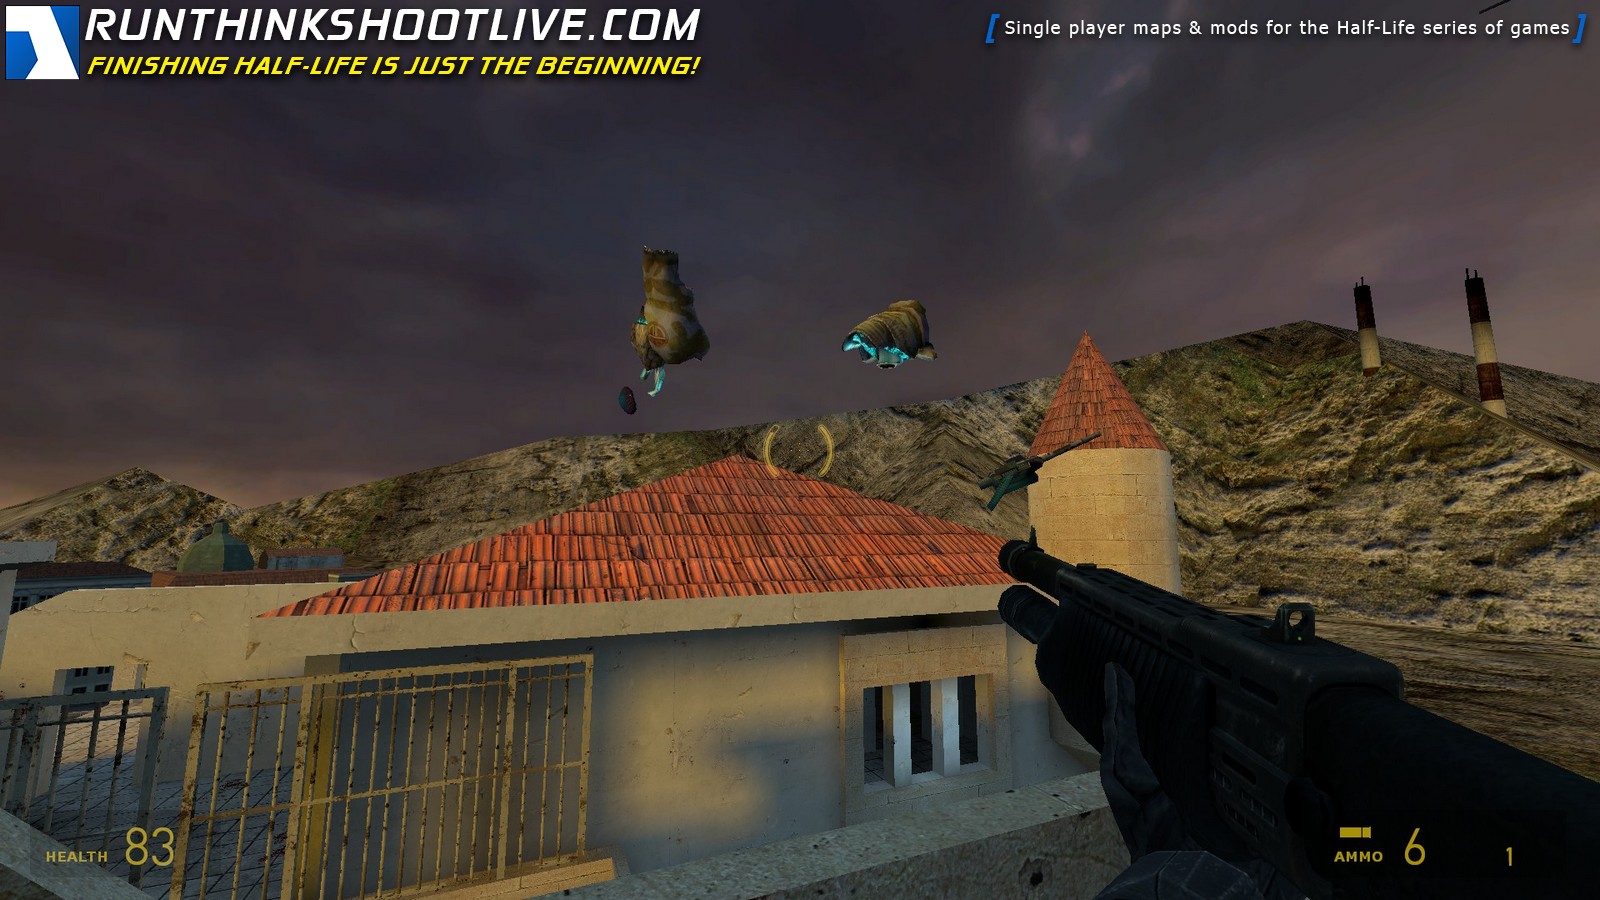
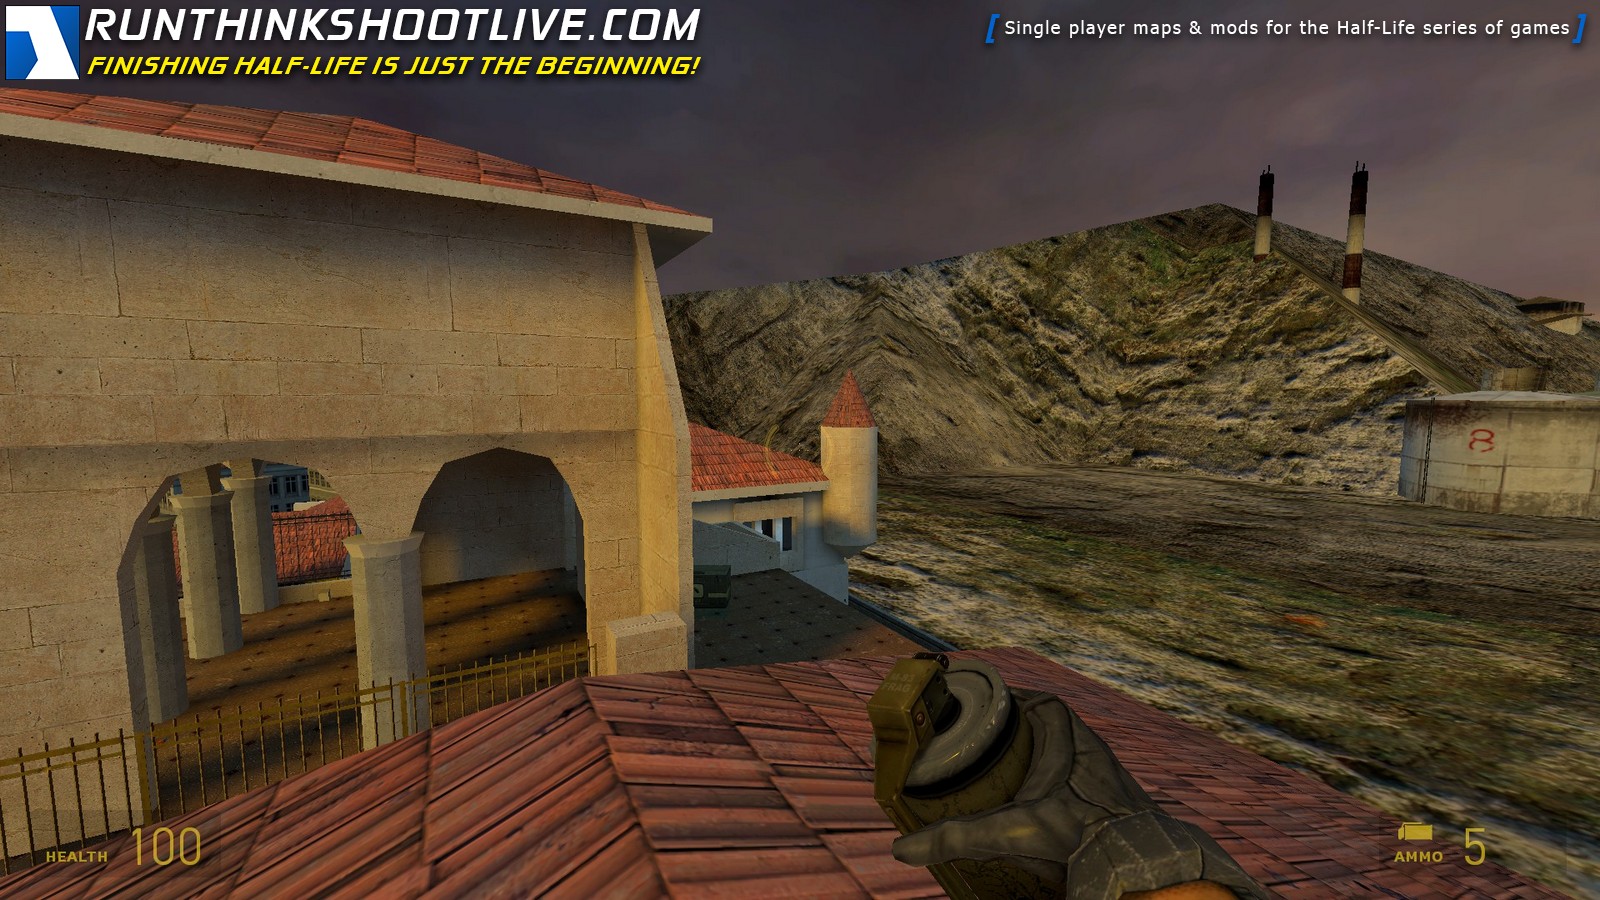
Depending on how far you’ve ventured in the corridor, you might encounter some additional reinforcement. These Combines carry SMG and shotguns. Do what you want with them. There is significant risk in going to the tower, since the gunship is still circling in the sky and there is less cover overhead. However, the reward is great. There is a healthkit, a rocket launcher (which is essential in taking out the gunship eventually), and a box of grenades in the tower. If you move fast and avoid being spotted by the gunship, you can grab all the goodies without getting hit.
As you go further to the balcony area, you’ll encounter some more opposition with pulse rifles. Either toss them some grenades or use your own pulse rifle rounds on them. It’s tempting to go down the stairs in the dark corridor connecting the prison and the balcony, but I recommend against it. The stairwell is a highly patrolled area, and you’ll likely to face tremendous resistance and firepower if you go down that route.
Instead, go to the far side of the balcony. You might have to sprint to get there because of the patrolling gunship. There are some rockets and a battery in the corner of the balcony. Snipe out some Combines on the level below if you wish. You can find another set of stairs going down below. Approach carefully, because there might be a guard with a shotgun waiting for you (he might actually run up the stairs and fire at you even before you start the descend). Whatever you do, don’t linger at one spot and reload your weapon frequently. I find the shotgun and the frag grenades most useful to clear the area below. There are lots of Combines down there. Below the staircase, you’ll find a healthkit with some additional ammo for your SMG.
After you think you’ve cleared the room with the statue, don’t just go down there and collect the ammos and health vials leisurely. Keep your eyes open for a lone squad member who’s been hiding in the dark, waiting to ambush you with his shotgun.
When you’re ready to go down the stairwell with the hanging light fixture, do so cautiously. There is a turret waiting at the bottom, and some guards may have already started their way up to hunt for you. You didn’t just wipe out all those guards in the statue room without stirring up a big commotion. Either frag them with a grenade or two (if you have enough of them) or use your shotgun. Save the pulse rifle ammo for long-range enemies later. I would save at least one grenade for the turret in the corner.
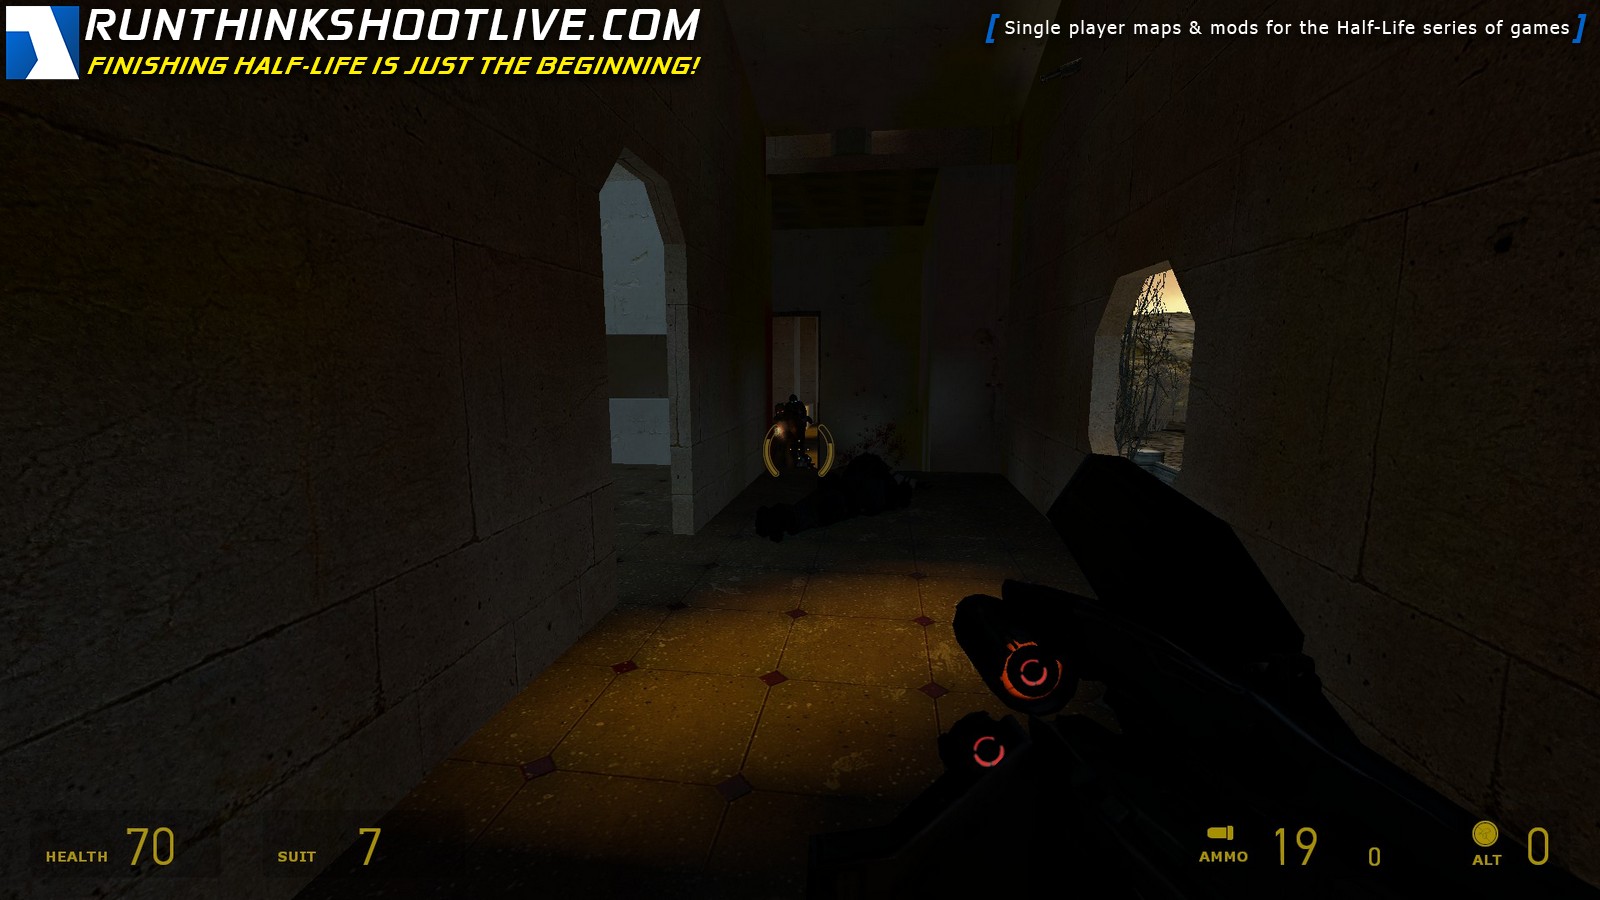
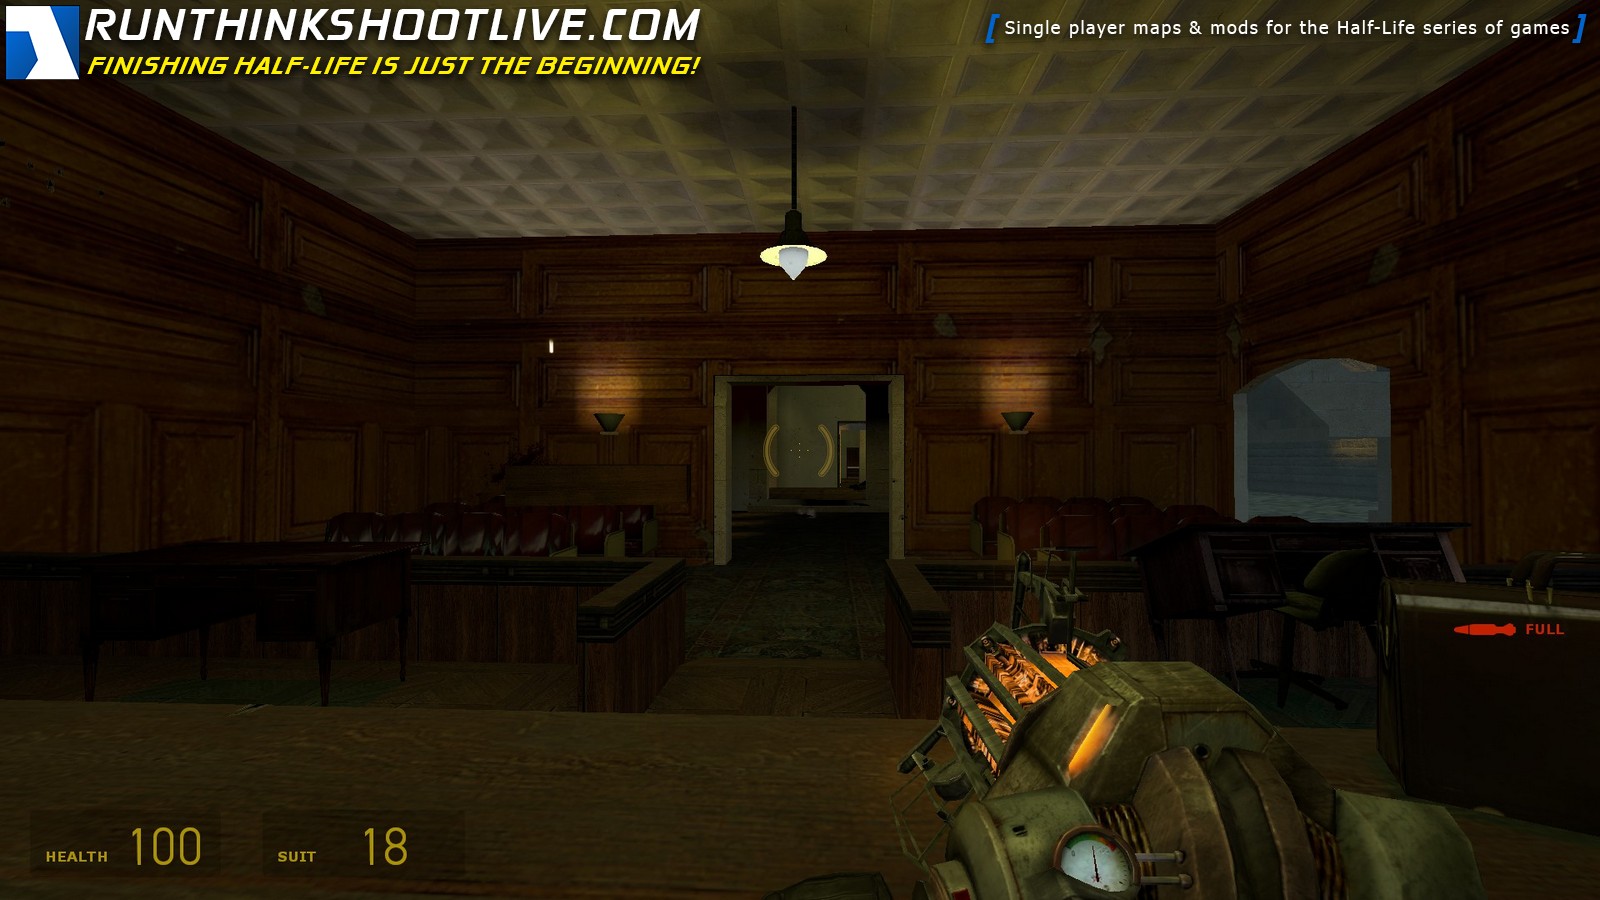
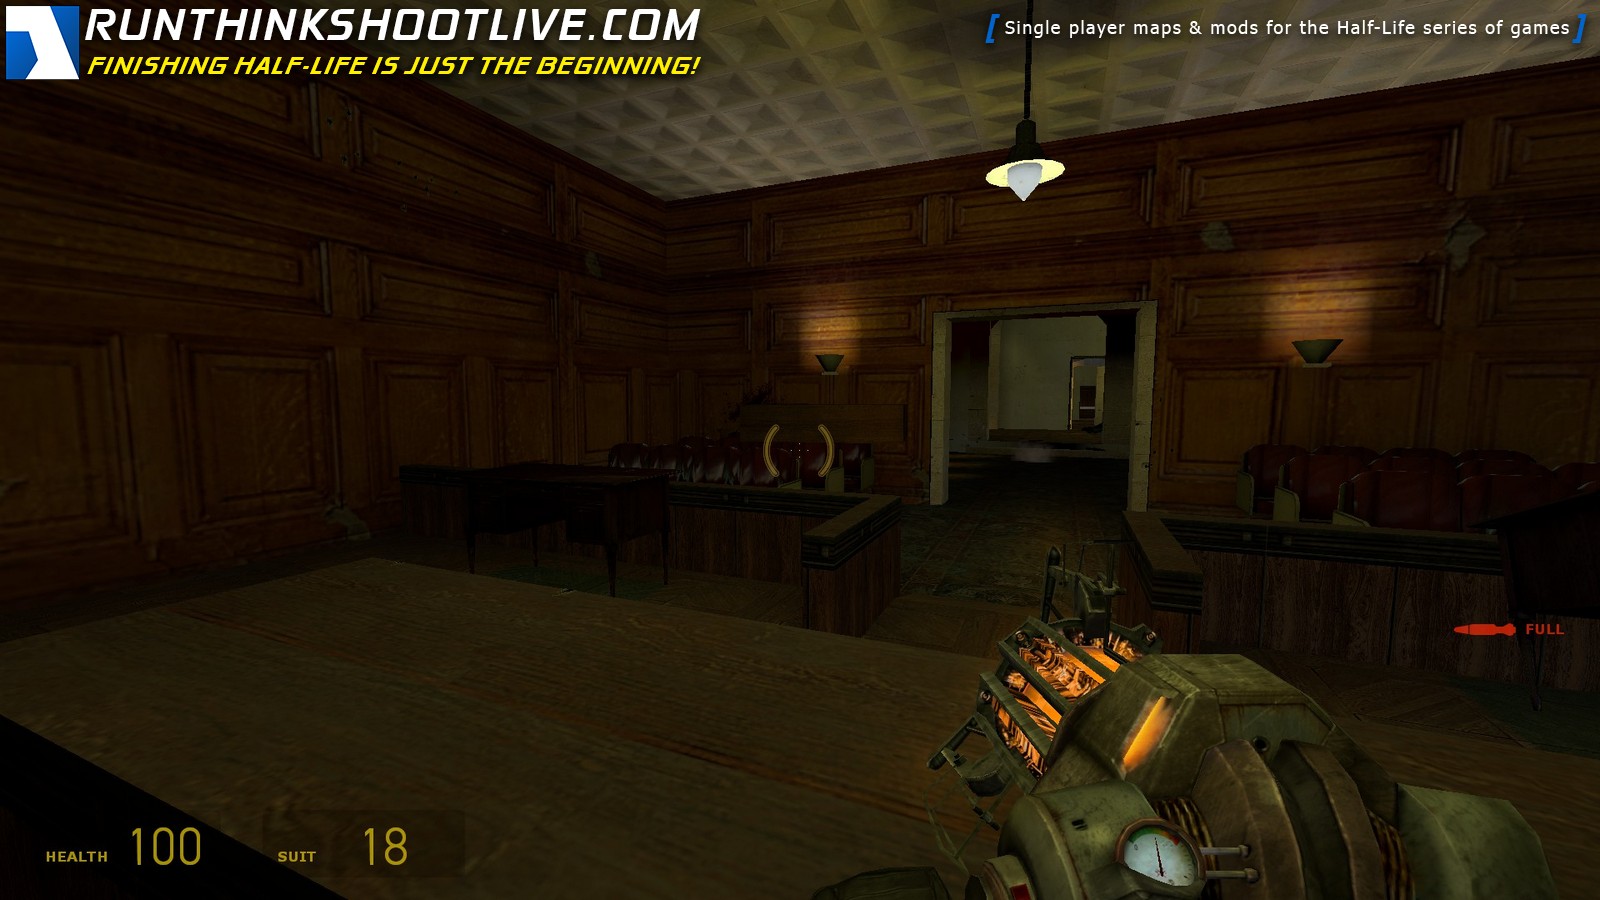
As you approach the courtroom, two manhacks will come after you, as well as some Combines in the judge’s chamber. I prefer escaping to the haven of the area upstairs and deal with the manhacks with my shotgun separately. After eliminating the manhacks, go back down into the courtroom and kill off the remaining guards with the pulse rifles. Toss a grenade into the judge’s chamber and hear some Combine flesh splatter.
After a long hard battle, treat yourself at the health refueling station. There are also lots of goodies inside the judge’s chamber. Pick up the box of 0.357 ammo on the judge’s desk. The Magnum will come in handy later. You’ll also need to refresh yourself before going to the next building. The hardest combat is yet to come.
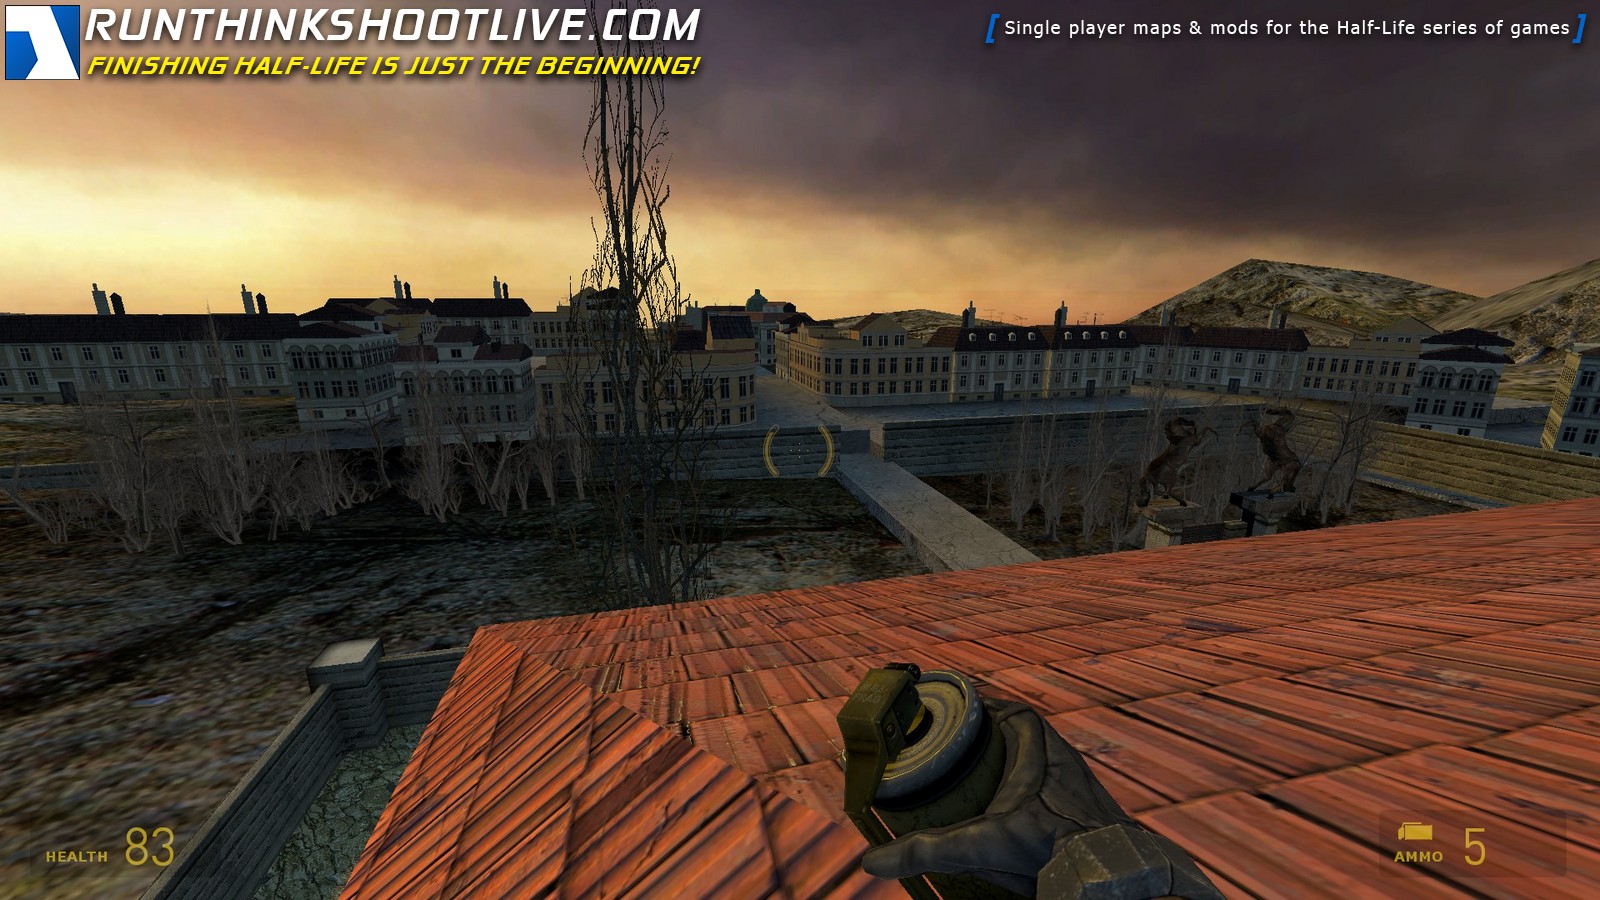
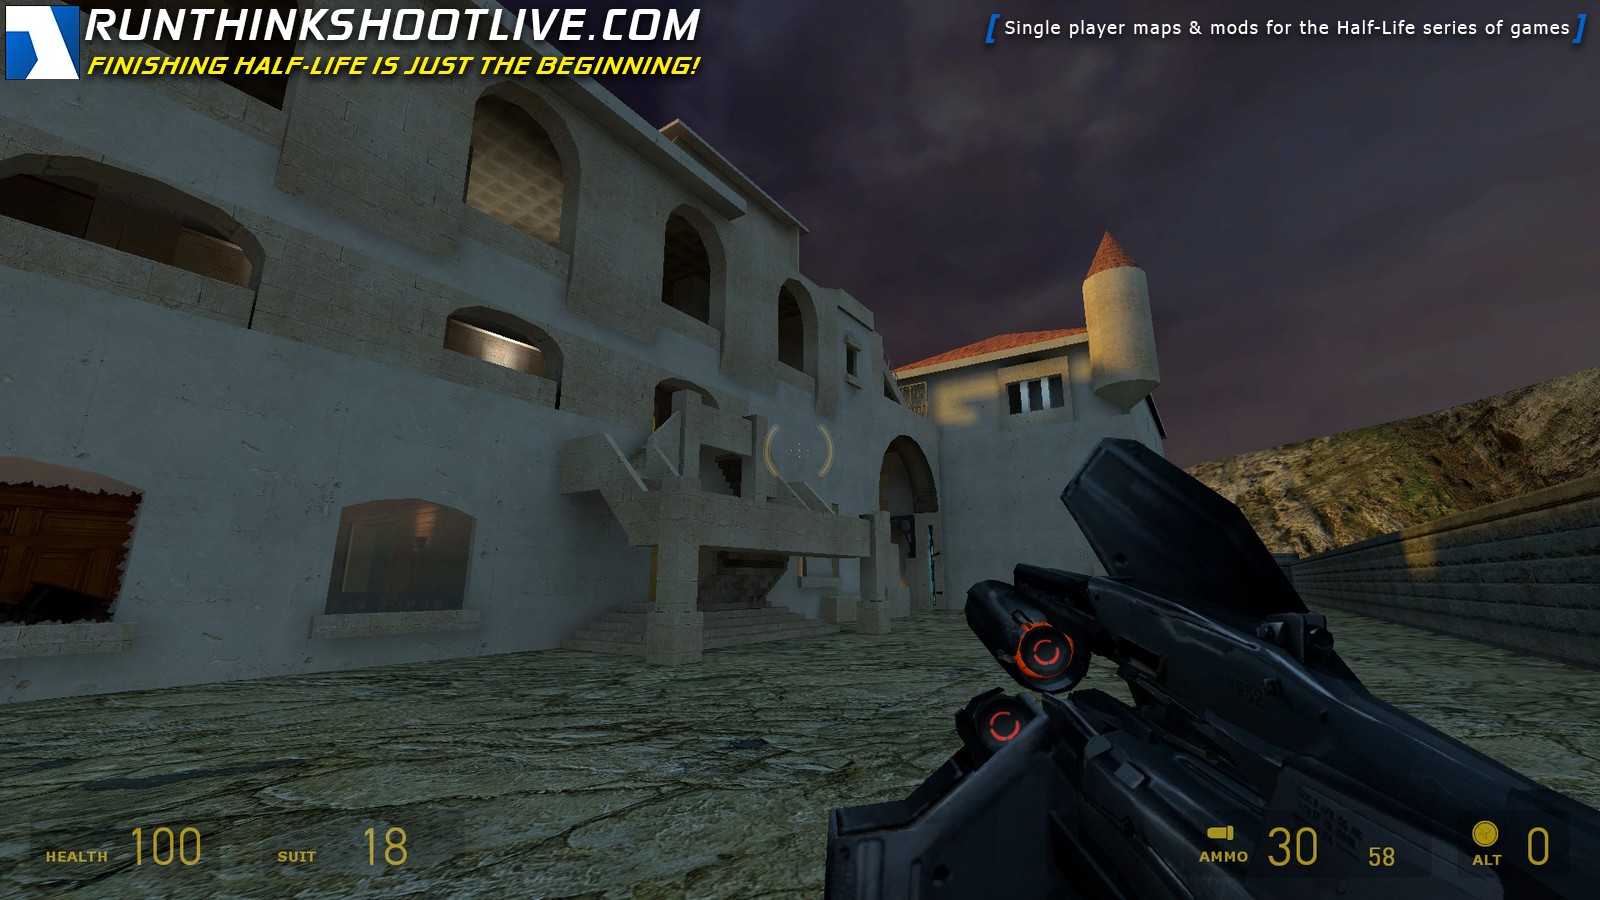
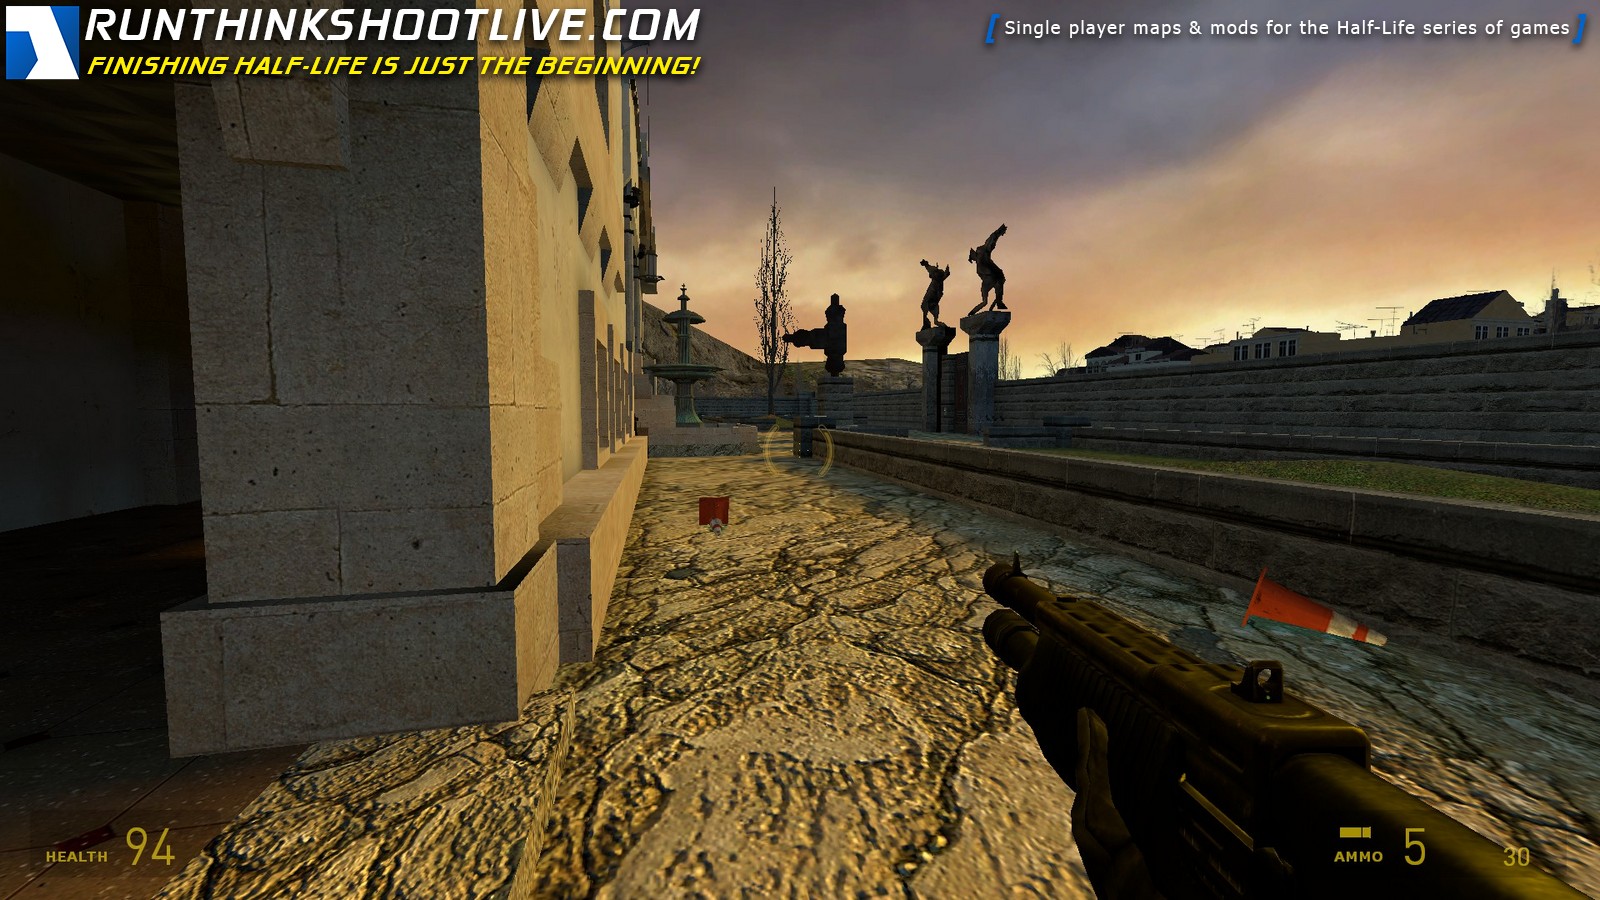
As you step outside the building into the arched covering, two Combines will rappel down. Take cover by stepping back into the courthouse building. Kill them however you like.
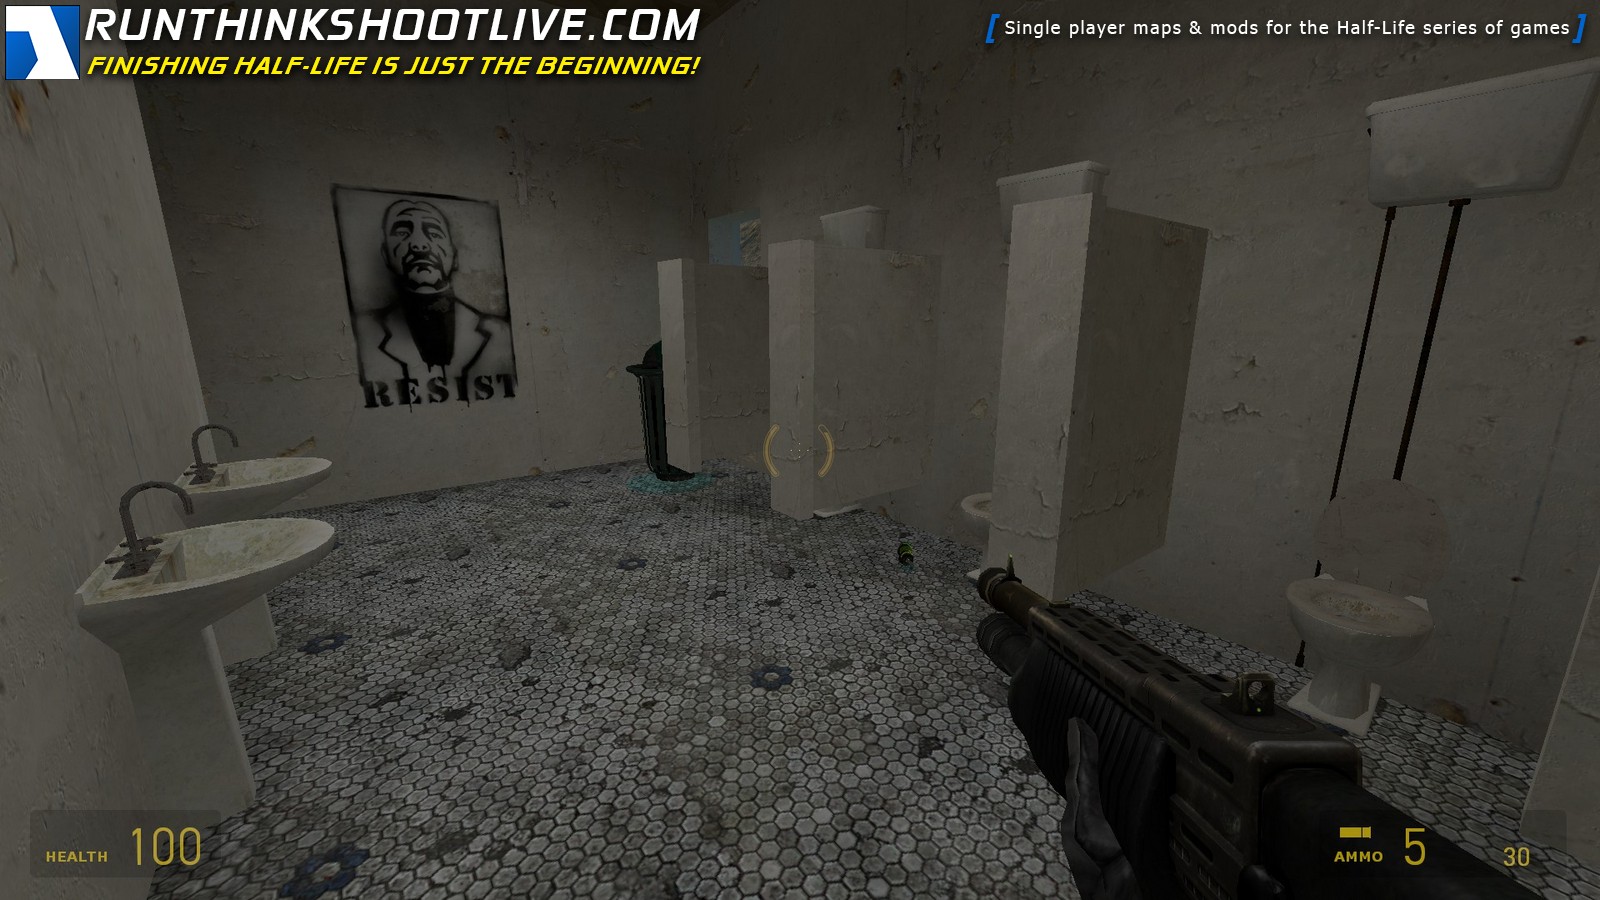
When you’re first inside the record building, everything seems to be eerily calm. Nothing explodes in your face and no turret loads you up with bullets. But reload your shotgun now before the fire breaks out. You should heal yourself with the health vial in the restroom. Don’t go down to the basement yet.
Get in front of the door next to the restroom, but don’t walk into the room. Perhaps quicksave the game at this time, because all hell is gonna break loose soon.
Switch to the SMG and make sure you have at least one secondary SMG round. Quickly step into the room and fire a RPG at the guards there. The Elite Guard might return the fire with a Combine energy ball, and you better get out of the way. I usually find a temporary refuge in the restroom, but sometimes they will toss a grenade into the restroom. But be prepared to have a fierce fight fight in the close quarters of these rooms. All the rooms are interconnected, so you have to be careful of Combines hitting you from all directions. Keep moving from room to room, and let the shotgun be your best friend. I’ve thoughtfully provided you with some additional shotgun ammos in one of the rooms. There is also a healthkit in the room with the long table (it’s on a desk cluttered with some computer equipment).
After you’ve cleared all the rooms, you’re now set to go down to the basement. However, don’t forget to get the access key to the conference room first. It’s sitting on a table (or where there used to be a table) in the room where the turret and the Elite Guard were originally stationed. When you have the key, do not go upstairs yet. You have to take care of some business first to make your entry less hostile.
When you descend the stairs to the basement, turn on your flashlight and look to your right. You’ll find a Magnum below the staircase. Reach out and grab it, but switch to the shotgun or the SMG before you reach the bottom of the stairs.
Be ready to shoot the poisonous headcrab that will attack you soon after you reach the basement. You want to hide behind one of the columns in the basement because the automatic ceiling turrets might start firing at you. After killing the headcrab, throw a grenade in the direction of the pile of crates. You’ll blow up a fast headcrab hiding there and also deactivate the security turret. Alternatively, you can sprint next to the turret and kill the headcrab with a shotgun blast and physically turn the security turret off from the control box. The security control also deactivates the ceiling turret in the conference room upstairs.
When the coast is clear in the basement (with all the turrets turned off and headcrabs dead), search for more ammo for the Magnum and also some rockets. There is also a healthkit in the adjacent room in the basement, next to a large propane canister.
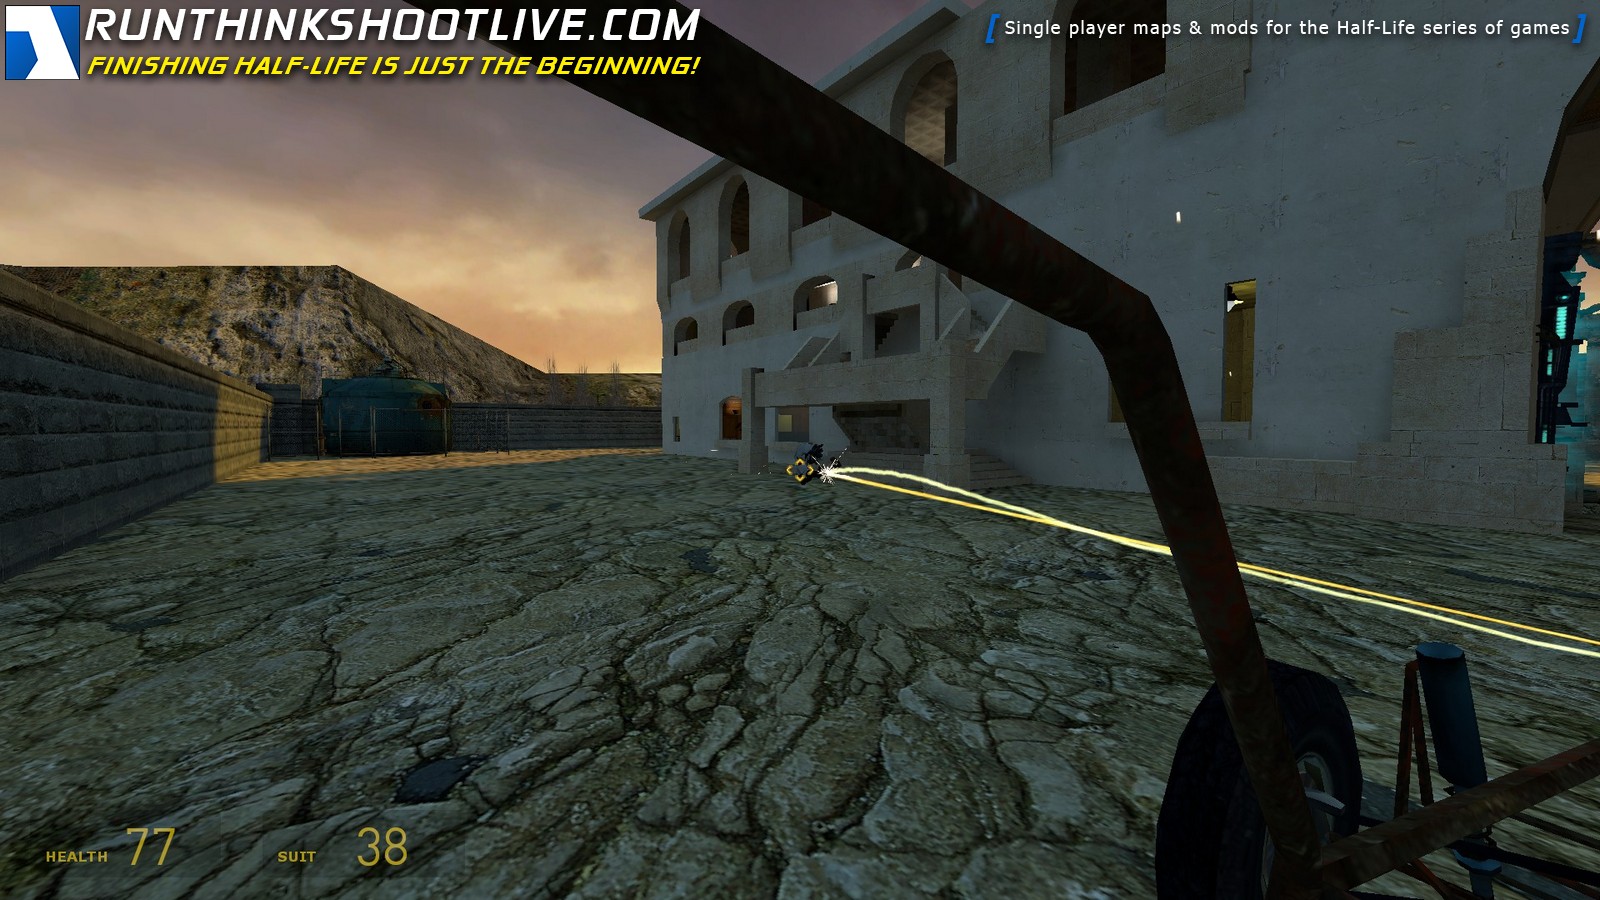
When you’re ready to fight again, whip out your trusty rocket launcher and proceed to take down the gunship. I prefer either going back up to the tower or go to the backside of the courtyard and aim at the gunship. There are plenty of rockets around, with some in the judge’s chamber and lots in the basement. There are also various other locations with scattered rockets, you can usually find them pretty easily.
With the annoying gunship out of the way, you’re ready to conquer the main conference room, where the key to the main gate is kept. When you go up the stairs, do so slowly with weapons pointing to where you’re going. Some soldiers might be waiting for you already. In addtition, there is another turret to your right when you have fully ascended the steps. Just run toward it and blast it with the gravity gun.
Use the access key you obtained from downstairs to open the conference room door. Two Elite Guards wait for you, and you should take them out as quickly as possible with the Magnum or pulse rifle. They can do some serious damage to you with their secondary pulse rifle rounds.
The ceiling turret should already be deactivated by the control in the basement, but you should still proceed with caution. There are two Combine roller mines in the conference room, so I would jump up to the conference table to avoid getting damaged from them. As an added bonus, there is also a healthkit on the table.
Use the gravity gun to toss out those roller mines to the corridor outside. Take advantage of the suit charger in the room, and grab the access key to the main gate sitting on the table with the surveillance monitors.
When exiting the conference room, avoid running into the roller mines you’ve thrown in the corridor. Go back down to ground floor and exit the building at where a parked buggy is waiting for you.
Hop in the buggy and back it up a bit. Mount the buggy gun to kill off some of the Elite Guards waiting for you near the entrance of the premise. Alternatively, you can go back into the building (either the record building or the courhouse) and snipe at the Elite Guards as they come after you. You should have plenty of ammos at this point, and these soliders are your final obstacles.
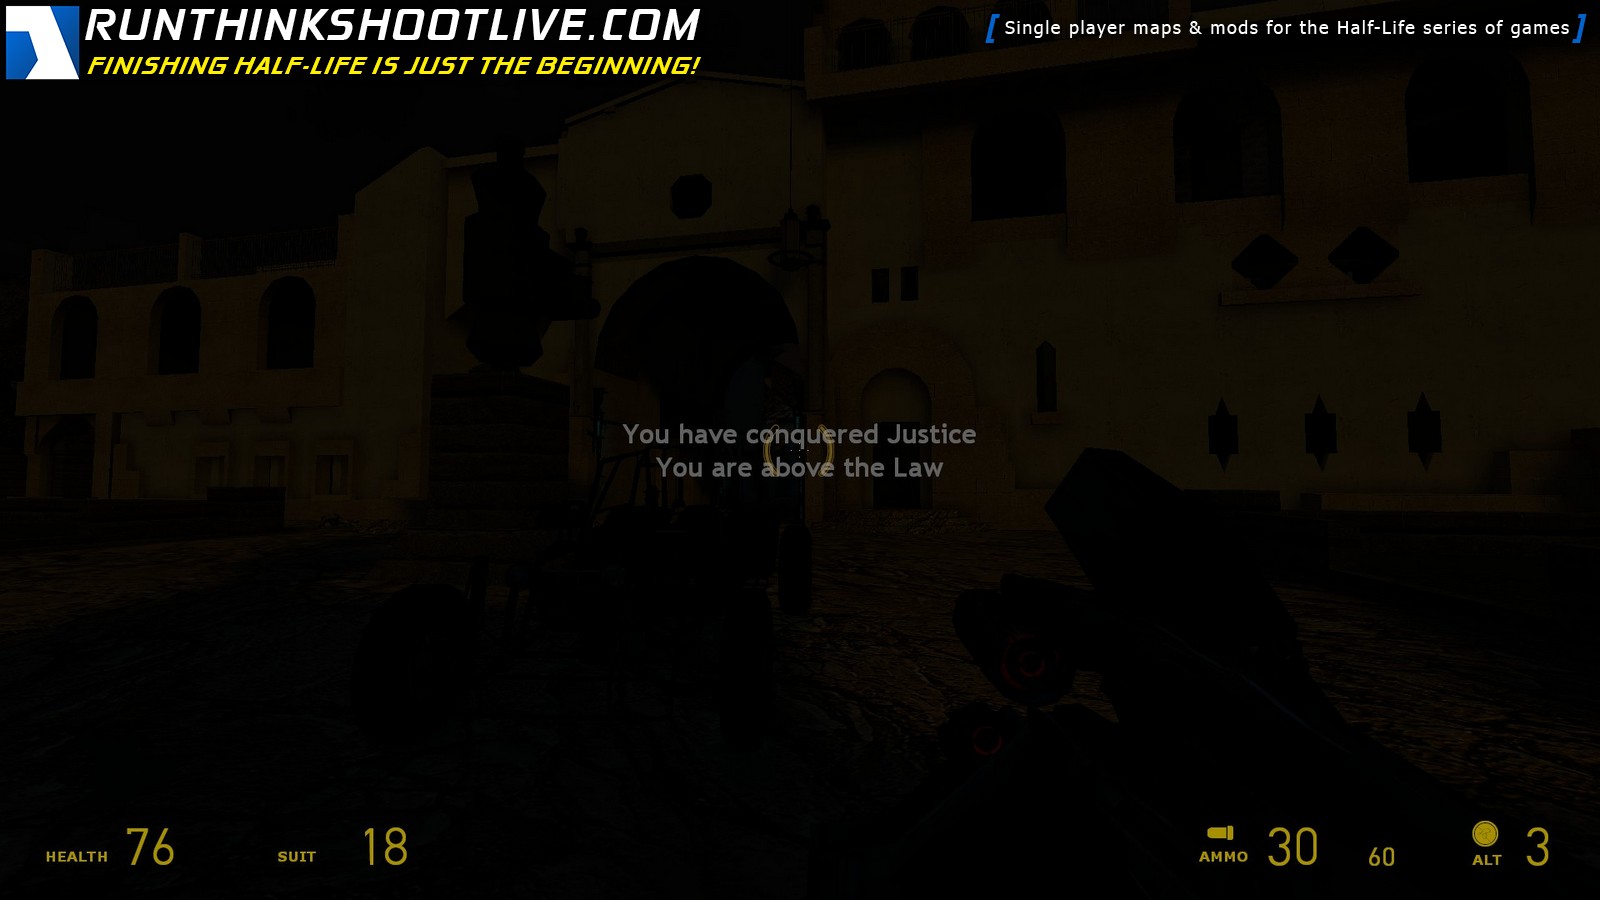
If you’re successful in avoiding being hit by an energy ball, you should eliminate these gurads with relative ease. Proceed to the main gate and bust out your access key. Use the keypad and taste the sweet victory.
There was an earlier version of the map with two antlion guards in the courtyard instead of the gunship. After playtesting with members of the SnarkPit, I decided that having a gunship can take advantage of the layout of the map so much more than the antlion guards. The older version is no longer available for download. I hope you enjoy this new version as much as I enjoyed creating this map.
-
1,999Overall
-
0Today
-
0Last 7 days
-
12Last 30 days
-
129365 days
Using Gauge: Users
Manually: 7 Users
Time Taken:
Average: 0 Hours, 26 Mins
Shortest: 0 Hours, 5 Mins by Daken50
Longest: 1 Hours by Avantgarde95
Total Time Played: 3 Hours, 55 Mins
This release is currently not in a collection
If you believe this release is missing important tags, please suggest them in a comment?


I am the mapper himself, and I just want to inform everyone that I have written a detailed walkthrough for this map, so if you get stuck (or simply end up dying too many times), a few tips might get you going.
Hey Satchmo – enjoyed yr map!
Hey Satchmo,
Just wanted to say I loved your map and placed thru it twice soo far. The only downfall was that I wish you could use the buggie outside alittle more. I had massive trouble trying to turn it around/move since its cornered pretty tight
Regardless, keep up the excellent work and hope to see more maps in the future from you :0)
I originally designed a wider courtyard and placed two antlion guards (those big-nosed ones) in the yard, and the buggy was put in to battle them.
However, I switched the antlions to the gunship because the combines had a tendency to kill off the antlions before the player gets to them. So, the buggy is really a leftover piece of gameplay from an older version of the map.
It was pretty thrilling to be chased by two antlion guards in the yard though, and they even followed the player in the indoor areas. But they created too much gameplay problem that I had to let them go.
I love this map. I sat down and played v3 six months after first playing v2 six times over again, trying to find the best route to take for minimal player damage. I actually managed to play through it without quicksave on the hard setting. It’s a different sort of gameplay that takes a bit of getting used to. But I loved it, and it has great replay value. It reminds me of FarCry, how there’s a completely open area that you can move through at your will. I never found need to look at the walkthrough. The most satisfying gaming experience I’ve had in a while, no exagerration. Ace.
Hi, this map was pretty good.
I am mapper myself and now how hard work it takes..
Gameplay:
you’ve been taken to a prison and are currently awaiting trial which won’t be a fair one, so you decide to escape. The map is rather simple to play through and nothing to hard that gets in your way. The fights are very easy to get through once you get the shotgun, otherwise automatics and grenades are still there. The only enemies you will be figthing most with are the combine with a gunship outside which I found rather useless since you can quickly take it down early in the map. To get out of the prison you must venture through and find the key to the front gate as combine, manhacks and turrents get in your way around every corner.
Design:
The structure of the map is great with an interesting design to building on the exterior. Texturing however is a bit bland and basic which could have been a lot better. The lighting is also rather bad, both outside and indoors while some of the lighting appears on the other side of corridors which destroys the visual side of things. Skybox has a quite atmospheric look yet again it could have looked better with better texture choices.
Conclusion:
Interesting exterior structure yet with bad lighting throughout with a very easy and simple gamplay.
Rating: 68%
How good is this – very, very good! Superior to many mods so far this year (2009).
Great game play, great arenas, great design visually.
As for the rating of 68% above, a joke presumably.
98% from me
Loved it. Thank you Satchmo
nice and dificult map… I finish it in hard mode and was quite tough.. but I liked it
as I continue to play through all the older maps I found this one to be quite enjoyable, it can be played a number of ways using different strategies. I found slow and steady the best approach, the circling airship adds alot to how you go about moving around the different areas. this was a fun little map with good game play value.
First of all, let me point out that the link here is broken. I downloaded this map from ModDB. Thanks Sparks!
Anyway, this is one of the most impressive looking maps I’ve ever seen for HL2 and for 2005, this must have been amazing.
The map is huge and it can get confusing at times. It’s also a bit claustrophobic sometimes, but the combat is what makes it unique. The puzzles aren’t very serious, but most HL2 maps are like that.
Overall, I recommend this map. It’s huge, it’s unique and even though it’s blocky sometimes, it’s still a very fun map to play.
It was a challenge to take done that gunship, but satisfying.
Time to get my eyes checked. I missed the basement stairs three times.
Funny bug #1. You can walk around on top of the courtyard wall.
Funny bug #2. You can’t walk through force fields, but you can drive through them. Or is that normal?
Using Gauge
Medium
25 Minutes
Great non-linear map! You grind for better weapons, learn to navigate through the building and have multiple not so ovious ways to continue. The only problems I had were that some soldiers don’t load(only guns visible until i attack them) if you approach them from a wrong way. And I tried to figure out how to save my fellow inmate, but it is impossiple(or i missed something).
Wonderful arch design from the inside to outside. I really enjoyed this map! Great job to the author!
I felt a bit confusing at first. I didn’t know if I was supposed to wait inside the cell or get shot from the dropship and other combine soldiers only with a crowbar. But well, that was pretty intense and challenging.
The details could have been improved a bit more to make it look like a fantastic map to play. Overall, I do like how we can play this map in many ways, with many routes and paths – going back and forward to where you previously were. Good touch.
Manually
Medium
35 Minutes
Decent combat-oriented map here. It’s a reasonable challenge and it doesn’t really fool around in terms of getting you to the meat of the map. You escape your cell and you’re right in it.
I didn’t like the severe lack of ammo. I never like having to crowbar Combine or metrocops to start, but I had to do that for the first few. For some reason several of the first few enemies didn’t drop their guns so it was some time before I got the machine gun – not sure if this inconsistency was a bug or intended (why??). I found the key to be using the gravity gun wisely. There aren’t really a lot of props around that you can use except for the trash cans scattered here and there. That at least saves you ammo and lets you get to the balance point where you’re starting to pick up more ammo than you’re using.
I did also have the problem of some enemies being invisible until attacked (most obviously the first Combine you run across where you only see his floating gun). Not a big deal.
I was disappointed I couldn’t go back and rescue the fellow prisoner who gave me the tip about how to get out of the complex. Overall, decently challenging and fun but lacking some flair and polish.
Manually
Medium
25 Minutes
My first thought was one of a CS map. I always associate desert and sand-type textures with Counter-Strike. It’s a fairly open map in the sense that once you are out of the cell, you can go in a few different ways but ultimately you need to get some keys to exit the main gate.
As Unq said above, it’s a shame we couldn’t rescue the other prisoner but that’s not really the objective. Again, as has been said and can be seen from my video, some of the enemies are invisible except their guns and that must simply be a glitch in the map – it is 13 years old!
All in all, I did enjoy playing this and suspect you will too.
Manually
Easy
15 Minutes
An overall fun map. Heavy on close-quarters squad combat, with enemy placement that keeps you guessing. The detail-heavy, claustrophobic and porous geometry naturally leads to a sort of fast-paced, strafe-and-cover shotgun combat where you never quite feel safe in your spot. More than once I found myself in sticky situations where enemies were pouring in from two or more different directions, which is always fun.
I do have two main caveats:
A.) Too dark! The map lacks light sources, and the ones it does have are not bright enough. Instead, most indoor areas rely on skybox light coming in through windows. As a result, most of the map has a murky feeling to it, where you can navigate through the environment, but it’s just borderline enough that you’d rather use your flashlight. This is frustrating because in a hectic combat-oriented map using the Half-Life 2 engine, you’d rather be using your AUX power for sprinting.
B.) Confusing! While I gradually came to learn the layout, the lack of clear visual clues to indicate where you are and what are the possible progression paths often left me disoriented. I am not sure if this was the intended effect. Several times I ran into random notches in walls, thinking they were secret pathways. Other times I ran around in circles, searching for where to go, overlooking obvious pathways (e.g. noticing the staircase to the conference room took me longer than it should have). I never did find the RPG. To me it seems like a direct results of the lighting problem: Most mods/maps, including Valve ones, use light as a guide for players. Well-lit areas are where you should be, darker spots are background detail. When designing dark areas (such as the Underworld in Episode 1) good maps keep the geometry clean and simple. Justice features low-light areas combined with complex geometry, and suffers as a result.
Despite these flaws, Justice is a fun short little experience. Good and balanced combat is not easy to design, and it must be commended for creating a HL1-esque feeling of cathartic chaos you don’t see too often in Half-Life 2 maps/mods.
Manually
Medium
20 Minutes
Wow, this got lots of nostalgic feeling! Overall This mod reminded me of those HL1 maps based in one big structure or location and with great emplacement of enemies ready to combat.
Also, there are basic strategic mini tasks inside the map, like retrieving keycards or press some basic buttons, like the one which is used to deactivate the gun ceiling turrets.
I played both maps available and both have minimum variations. I guess this is a great example of how a deathmatch multi-player map, can become a great single player one!
I also would like to rescue the cell-mate but the whole map is despite that very enjoyable and fun!
Using Gauge
Medium
20 Minutes
Not really the kinda map I’d normally go for if I’m honest. The helpless feeling at the start is kinda continued on because of an extreme lack of ammo and health supplies. It’s one of those maps you need to play over and over. And save often!
I also noticed “bugs” as many soldiers didn’t drop a weapon to use which was REALLY annoying. I also saw the floating guns.
Fun map if you like this sorta thing.
Manually
Medium
30 Minutes
I like the visual of the building! At the start, the ammo was scarce so the difficulty was a little bit high but after killing some enemies I was able to handle the fights well. Nice mod!
Manually
Medium
1 Hour
Good map. Game play? You have to take down three combine with a crowbar while eluding a gunship. Ammo is tight at first. Didn’t really do it for me.
Manually
Easy
5 Minutes